Where to do the Plotting and the File Types Involved
A route or “track” is essentially a long list of co-ordinates. These lists are mainly known as gpx or GPS Exchange Format files. A related type is kml which is primarily for viewing with google earth. But unless you only use google earth, stick to gpx types as they contain all of the data and are convertible to kml later anyway.
This stage of the process is about you plotting your own route. If there is someone else on the ride and one person plots the route, they can send it by email to other riders who may then avoid this part of the process. Once in a transferable format, the track can be emailed to be opened on a different device from the one it was created on. On the web if you search something like “Eurovelo routes gpx” you soon see the possibilities of using routes that other people have already plotted.
Let’s go back to where you are plotting a route from scratch. If the navigation device you will use when you are out on the ride is a smartphone but you have a bigger screen (tablet, laptop or even a PC in an internet cafe) then you are better off doing the plotting on the bigger screen.
There are nowadays several mapping apps specifically for cycling. One of these, Map my Ride, is of special interest as it allows us to plot a route that is partly on “road” and partly off “road”. “Road” is a googlemap road. If plotting in google maps (or apple maps), we have to stick to roads. Mapmyride is great because it allows us to leave the road. The map screen can be varied from OSM, to google (maps) to satellite. So, the forest tracks that are visible from the satellite can be “clicked along” with the “auto follow roads” function turned off. A bit more on mapmyride later.
The maps on mapmyride don’t show accommodation. That’s why we only use them for “off-road” stretches. After early problems, Apple Maps are working. But most of Vivente World Randonneur experience is with google maps. It is free and everywhere. No need to register. You can enter start and finish names or addresses and select bicycle as mode. Vivente World Randonneur has used it in dozens of countries very successfully. Below we take you through the detail of how to plot a route using googlemaps. The following instructions are set at a basic level so you may be able to skip bits. They use examples from actual tours.
Prepare the smartphone the first time it is to be used for mapping
Once this is setup there will be no need to repeat this section.
- Download the OSM (OpenStreetMap) app.
- Download the OSM map for the country/continent you are travelling in
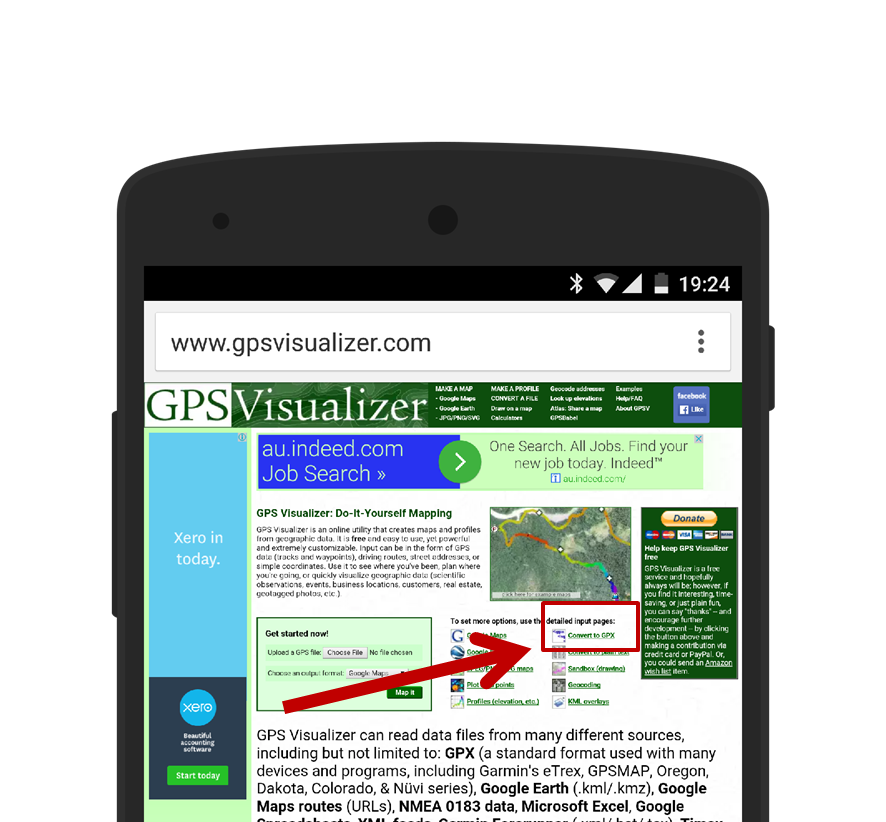
- Go to the website www.gpsvisualizer.com
In google maps, plot a route
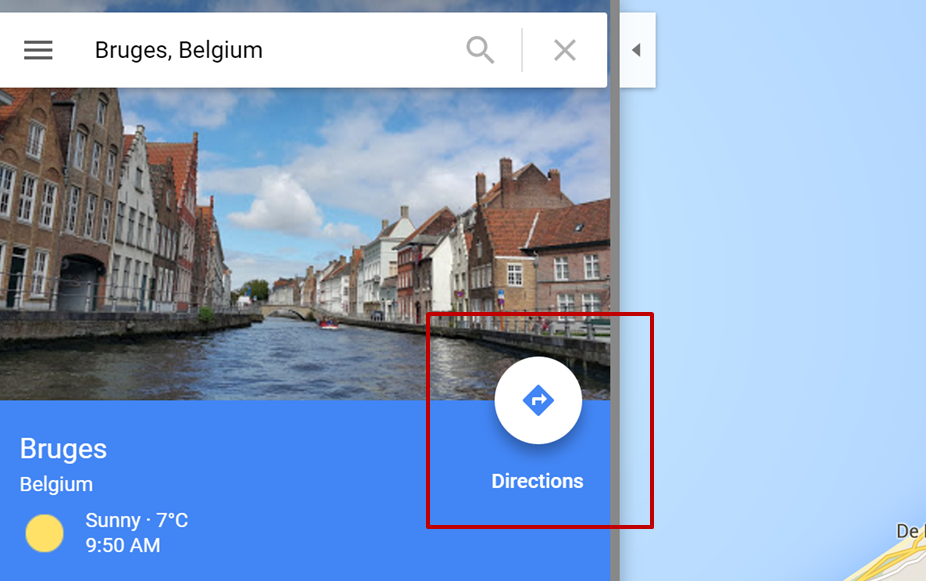
- Go into google maps: A simple way is doing a google search on the name of a place followed by the country or state it is in. The search results will include a map, on the right side. Click on this and you are in google mapping. You can also go directly to www.maps.google.com and search from there.
- Select the directions icon that appears on the left side of the map. This will show you directions to the searched destination from your current location.
- Enter start and finish, reverse the direction arrows as you like, look at the altitude climbed and descended, look at the total distance, and do Wikipedia searches on any spot along the way to see if there’s anything there you might like to see.
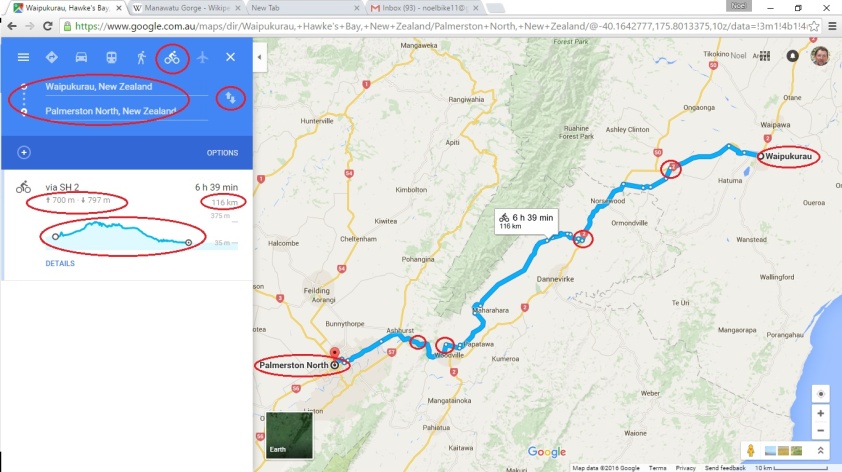
- Use the bar menu to the left of the mode icons to access the terrain screen.
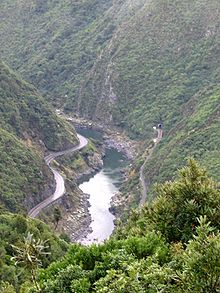
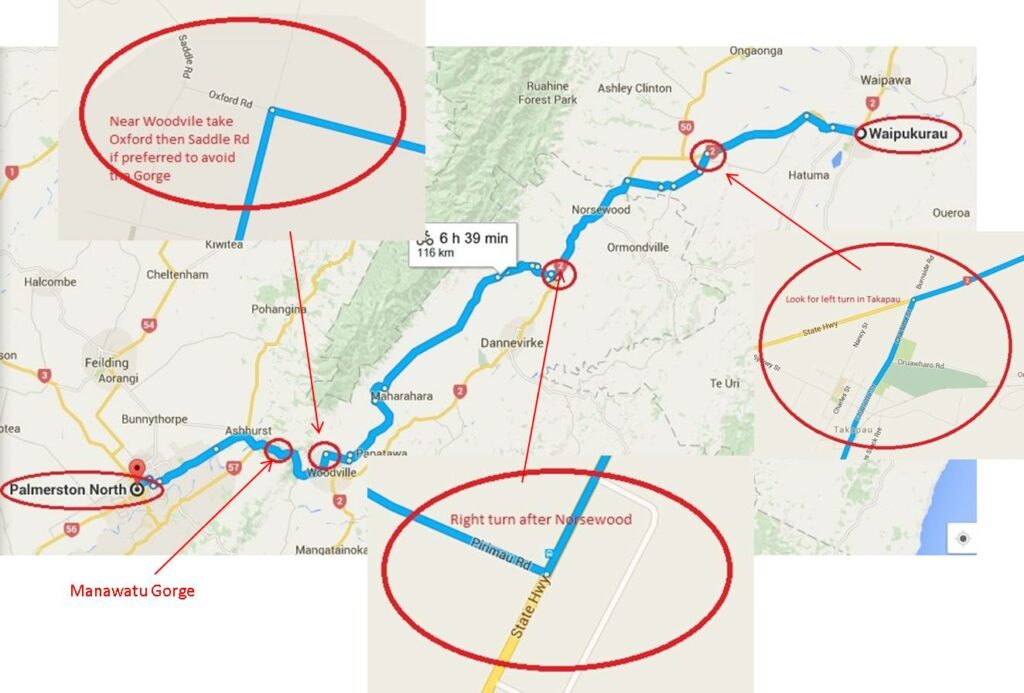
In this example the route passes between two mountains. Zooming in on the area to the west of Woodville shows- (a) there is a rugged section called Manawatu Gorge and
- (b) there is an alternative, longer and higher route called Saddle Rd for which a left turn can be made off Oxford St. In Wikipedia the picture of The Gorge Rd reveals it is narrow. We can decide on the gorge vs Saddle Rd later. We identify a few points to take note of. Choices can be made depending on traffic, rain, wind and time.
- A few notes about the turns (such as at the points noted below) will be handy.
Once a route is settled on, the top address bar holds a URL reference or web address.

This URL is now simply copied and pasted into the body of an email which you send to yourself. If you have any other way of getting the URL onto your phone you can do that too as long as the text isn’t changed. This is one reason why google maps is good for route development. It allows a route to be emailed as a URL.
Transfer a Route Plotted on Google Maps to a Smartphone When it is on-line, and Convert it to a track using gpsvisualizer
On your smartphone, open the email with the route URL in it. Copy the URL. (Long-press on it and an option to copy will be offered). Note that you can also follow the next few steps on your PC if you prefer. You will need to get the file sent to your smartphone later, though.
Using the browser go to http://www.gpsvisualizer.com/ and select ‘Convert to GPX‘
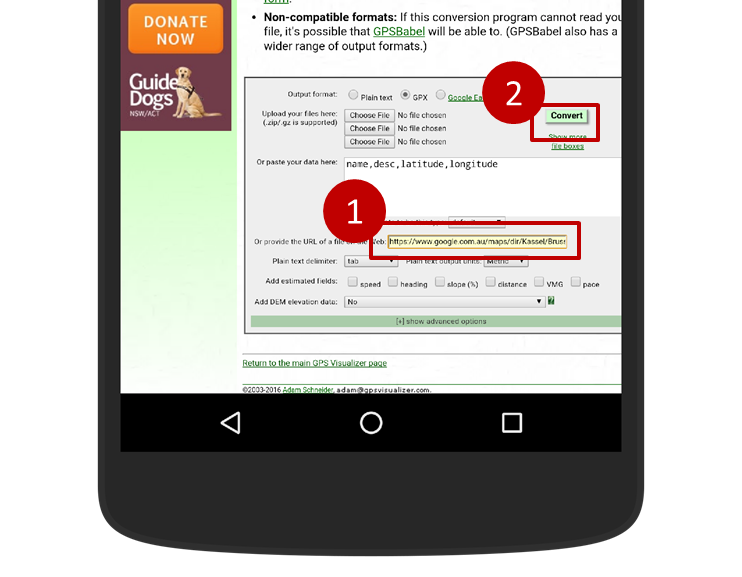
On the next page long-press in the field titles “Or provide the URL of a file on the Web:” (Enlarge the area and long-press in the box and select the Paste option that comes up.)
Once the URL is pasted in that field select “Convert”
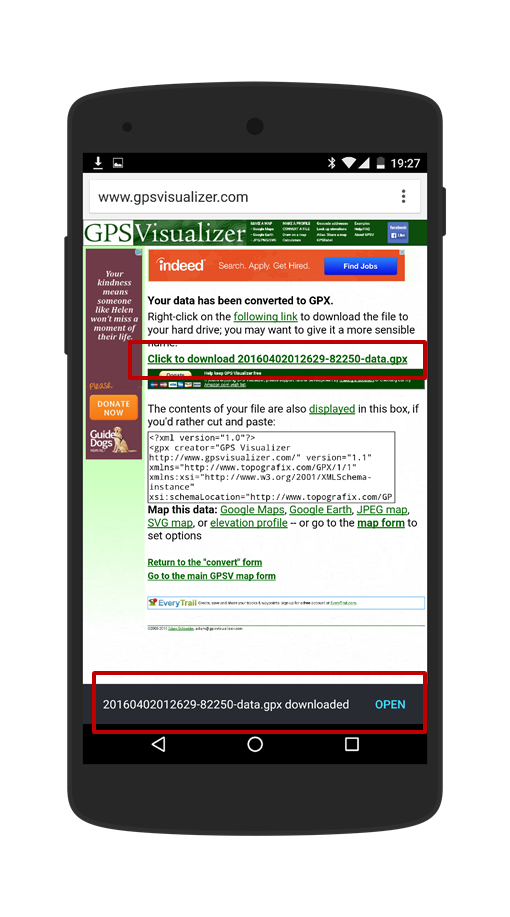
Tap on “Click to download….”. (This is the GPX file.)
In a few seconds at the bottom of the screen an option to OPEN appears. Select it.
You are done! You now see the map of your route overlaid as a coloured line on the detailed OSM map.
This has been the bare-bones tutorial. As you find time, explore some other options in gpsvisualizer. In the list where you chose Convert to GPX was Profiles. Select it and paste the route URL into the box that comes up and you’ll see the ride profile. There is much more.
Plotting a route where there is a section that is not a “road” – using mapmyride
Map My Ride (for which you have to register), has an excellent facility that allows you to turn on and off “auto follow roads”. By roads they mean google map roads. Viewing has options of “Open Street” (OSM), “Maps” (google maps) and satellite. An example where this is the ideal route developer is going from A to B across a mountain or forest or state border area where there is a road part way up and on the other side a road partway down but in between there are some unmarked tracks that you can see on a satellite image.
- Go to “Create Route” in the top menu.
- In the upper left box enter a place name or address and search for it. The map appears with this location in the centre and a message to click a spot to start mapping.
- Where there is a road, having “auto follow road” ticked and the view set to “Maps”, you can click along the road and the route will follow on the road.
- When the road ends, turn “auto-follow-road” off and set the view to “Satellite”. Zoom in so you can see the actual forest paths/tracks. Click on them a bit at a time, following tracks you can see from the satellite view, until you reach the start of the DOWN road.
- Turn “auto-follow-roads” back on and reset the view to “Maps”. Plot through to the destination. If you make a mistake you can reverse and you can edit the whole route later.
- Save the route with a name and an activity (bike ride option).
Transfer a route plotted on mapmyride to a smartphone when it is online
- After the route is named and saved, on the right, page down and you see “Export this Route (GPX/KML)”. Unless you are going to view it in google earth, choose gpx. It becomes a download file on the device you are mapping on.
- Assuming you are doing the plotting on a device other than your smartphone, the download file you just created, generally at the foot of your screen, needs to be sent to your email address so you can get it onto your smartphone.
- Start to compose an email to yourself. On a Mac, slide the download route file into the body of the email before sending it. On a Windows machine copy and paste the file.
- Go to emails on the smartphone and open this one. Select download (the icon with the arrow down to a horizontal line).
- Swipe down from the very top of the smartphone screen and recent downloads will appear with this one at the top. Touch it and it will open up in OSM.
- Once the file (the route) is there it remains there. You can make routes show and not show. But unless you deliberately want to remove it, it remains there when you open up OSM for that area.
As great as these facilities are, you might only use mapmyride in the special cases of there not being a road. The base maps are good but lack some commercial detail (eg lodging, that we need every day on the road). That is standard on google maps. Sometimes, with google maps, the program can’t resolve a short section where they think there is no road. But there might be a path of types and mapmyride is great for that stretch.