A bike tour typically neither starts or ends at your home. If you know how to pack and reassemble the bike you are able to start or finish a tour at almost any airport on the planet. With a few tools, some information and a little practice, anyone can do their bike packing on their own. You don’t need to be a bike mechanic. Successfully doing these tasks can be likened to following a recipe to make a cake. It is just a lot of details. You must pay careful attention to the details as hey are all important, but they can be followed and learned.
Carton Issues
We recommend you do not use soft packing such as canvas or plastic. A rigid carton is much more likely to see your bike arrive without any damage. The cartons that new bikes come in are available in many countries. But in the “old world” bikes arrive at the shops in CKD (completely knocked down) condition so there are no single bike cartons there. In those cases, if you can’t somehow keep the carton you arrived with (such as at a hotel) and reuse it, you may need to make a carton.
Making a carton is possible to do but best done only when you have the pressure of necessity weighing down upon you. Vivente World Randonneur test rides have often ended with this need to find materials and make cartons.
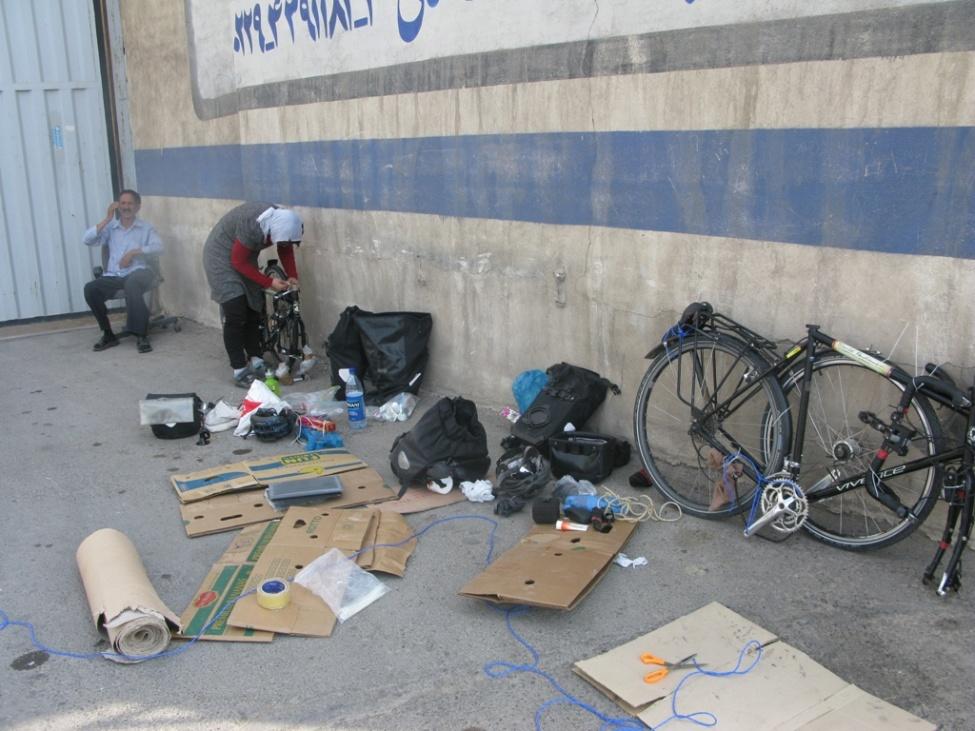
It is amazing how well rewarded you can be with a bit of study. For example, on a recent tour that was to end at Dusseldorf airport, on the night before it was ascertained that there were no bike cartons at the airport but there was a bike shop on the perimeter and only a kilometer from the terminal.
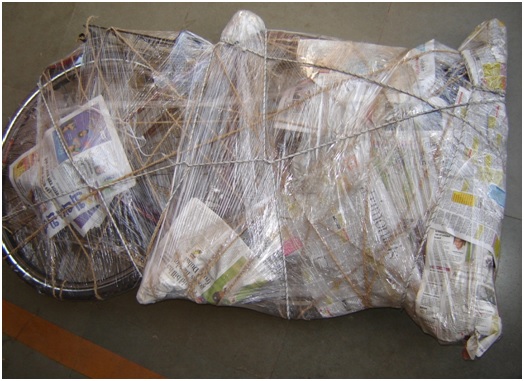
Hiding cartons at or near the airport when you arrive and reusing them when you go has been known to work a few times. You would not want to rely on it though as you’d have no plan B. Another extreme is carton-free-packing where you use a combination of a lot of rope, newspapers, bathmats, glad wrap, zip ties and packing tape, most of which can be bought on the way to an airport in the old world.
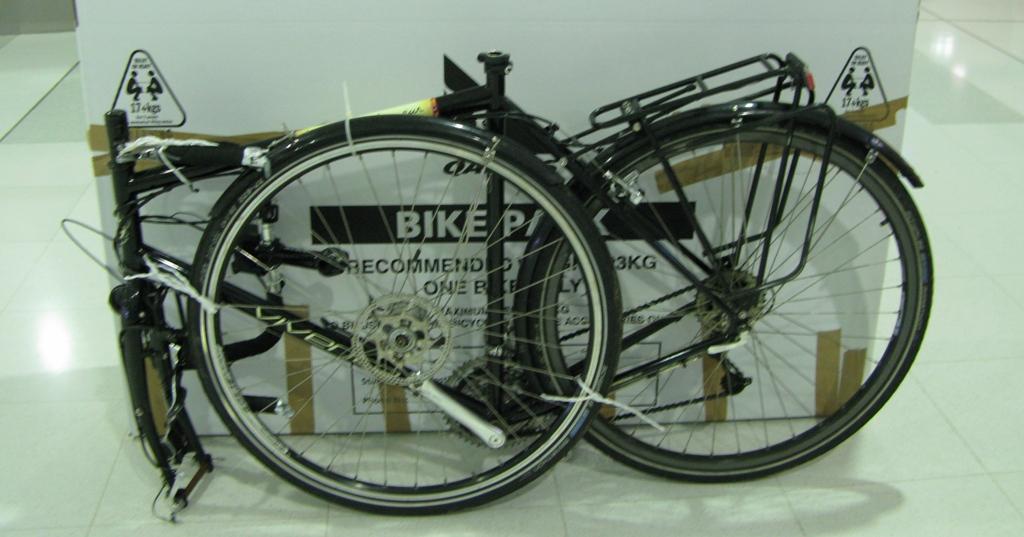
In the perfect world you’d find a carton the right length. If the carton is wide you can leave one pedal on, such as with the Qantas and Virgin cartons in Australia. If it is a carton that a new bike came in then you take both pedals off as in this video.
Brand new Vivente World Randonneurs are packed in almost the same way as we show on this video. Their carton lengths are XS 131cm, S 136 cm, M 138 cm, L 139 cm, XL 140 cm and XXL 141 cm.
| XS | S | M | L | XL | XXL |
|---|---|---|---|---|---|
| 131cm | 136cm | 138cm | 139cm | 140cm | 141cm |
| 51.57 inches | 53.54 inches | 54.33 inches | 54.72 inches | 55.12 inches | 55.51 inches |
Of course, longer is OK. Heights are 80 to 82 cm.
Sometimes bike shops are not helpful with used cartons. Once in Portland a shop said they had just taken their cartons to the recycling. No worries. We rode to another one. After the fourth shop said almost the same thing we got the message. The solution was found outside the train station. In Oregon Amtrak accepts bikes but only in cartons. So they have to sell cartons. But you can only buy one if you have a ticket.
In the rubbish behind the station were lots of once-used perfectly good cartons. They were too high but it was easy to cut them down. A carton was found but, with hindsight it may have been better to approach the shops offering to pay for a carton rather than asking if they “had a carton”.
Tools and Other Packing Materials
The Vivente World Randonneur bike packing video lists
- 4/5mm hex (allen) keys
- 10 and 15mm open-ended spanners
- 100mm bit of ½” copper pipe
- four pieces of centimeter long headset spacers
- a front disc rotor protector
All models produced from 2015, other than the Deccan which has cable disc brakes, you also need a hydraulic brake caliper wedge. At the reassembly stage you need a small pair of scissors to cut the zip ties and a pump. Most of these items come with the new bike.
Safety Issues and Particular Skills You Need to Have
The bike that is packed and then reassembled will be ridden with luggage at times at quite high speeds. So it is critical that great care is taken, particularly in the reassembly.
There are things that are common knowledge among cyclists so we will just list them. If you do not know all of these then you should learn them.
- How to take a quick release front wheel off and put it back on. Note that with a dynamo hub you point the terminal upwards in a 1 o’clock position.
- How to raise and lower the seat. Note, a mark left on the seat post will help you quickly re-find your seat level.
- How to pump up your tyres and recognize the correct pressure level. Note this level varies a little with tyre width and the combined weight of you and your luggage. Too soft risks damaging the rims plus causing punctures.
Some thing that many people do not have experience with but which is required in the bike packing process is removing and refitting the handlebar stem. The most critical step is the refitting, i.e. in the bike reassembly. We recommend that you do not loosen the four screws that hold the handlebars onto the stem.
We recommend you remove the stem itself for transportation. The stem represents 4cm of spacing above the headset. Once the stem is removed you should replace it with the spacers provided. When you reassemble the bike you remove these spacers and slide the stem (that holds the handlebars) back onto the fork steerer tube.
Before you refit the top cap, do a visual check and be sure that the top of the uppermost spacer sits above the top of the fork steerer tube at least 3 mm. This way the top cap bears down on the spacers and not on the fork steerer. As the top cap is tightened the pressure on the spacers goes down to the headset. Getting the tension on the top cap right (prior to tightening the two screws that clamp the stem onto the steerer) is the way the headset gets adjusted. Adjusted means not too loose and not too tight.
The test for too loose is
With the bike on the floor, the front wheel on, standing beside the bike, hold the front brake on and try to rock the bike back and forward. There should be no movement in the headset, especially at the bottom.
The test for too tight is
Stand beside the bike, hold the front end of the top tube and lift the front wheel slightly off the floor. Gently turn the handlebars left and right. There should be no grittiness.
There are lots of on-line videos on bike packing
Adjust The Bike Headset On A Threadless Steerer | YouTube.com
Threadless Headset Service | Parktool.com
Only after you have the top cap right, producing the best headset adjustment, should you tighten the two stem binder screws. Check the alignment of the stem with the front tyre so you know the bars are aimed straight ahead. They don’t need to be very tight but there is an important test to ensure they are tight enough. After tightening them, go to the front of the bike, put the wheel between your legs to stop it turning and try hard to turn the handlebars. You should not be able to.
In advance of a bike tour, practice this. It only takes a few minutes. You only need the allen (hex) key. Ask the folks at the bike shop if you could do it at the shop and have it checked before you ride the bike away.
Hydraulic Brake Issue
Most Vivente World Randonneurs nowadays have hydraulic disc brakes. A characteristic of these is that, if the disc rotor is not running through the brake caliper and the brake lever is operated, the brake will reset itself and you won’t be able to refit the front wheel to the bike. That is why we supply these bikes with a plastic wedge which you should insert into the caliper immediately the wheel is removed from the bike.
If you ever get caught out on this issue, it is possible to prize the pistons in the caliper apart. But it is best avoiding having to do this. It can damage the brake pads.
Time Allowance
An experienced person will comfortably do the bike packing job in 16-20 minutes. A novice will take an hour.
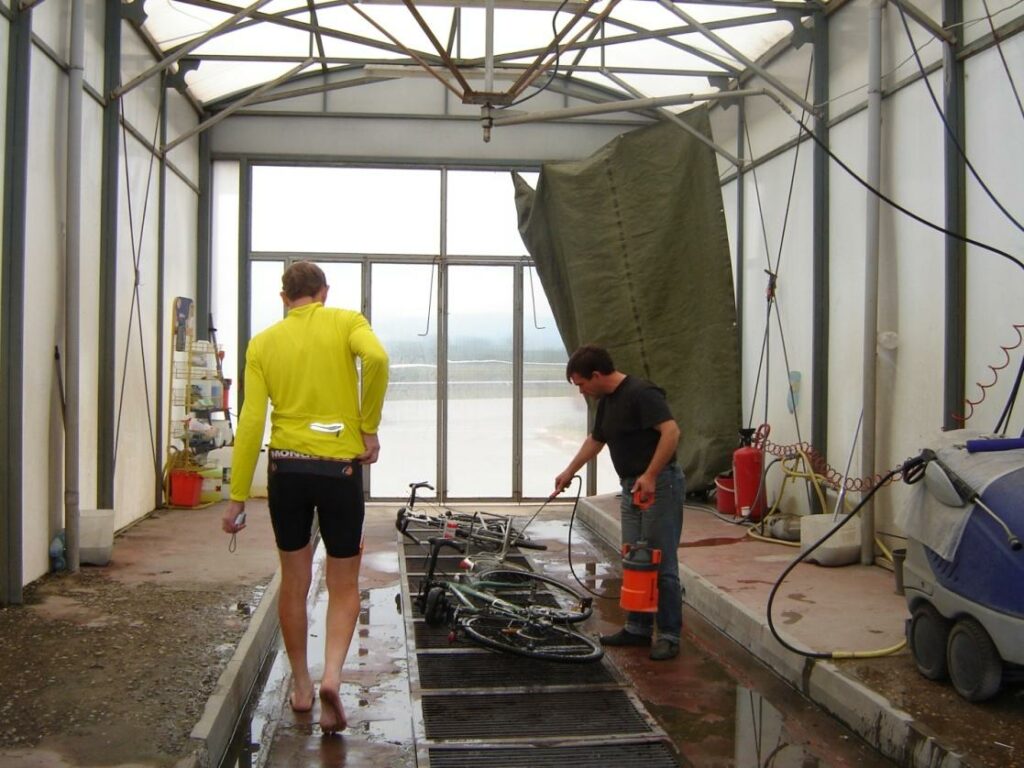
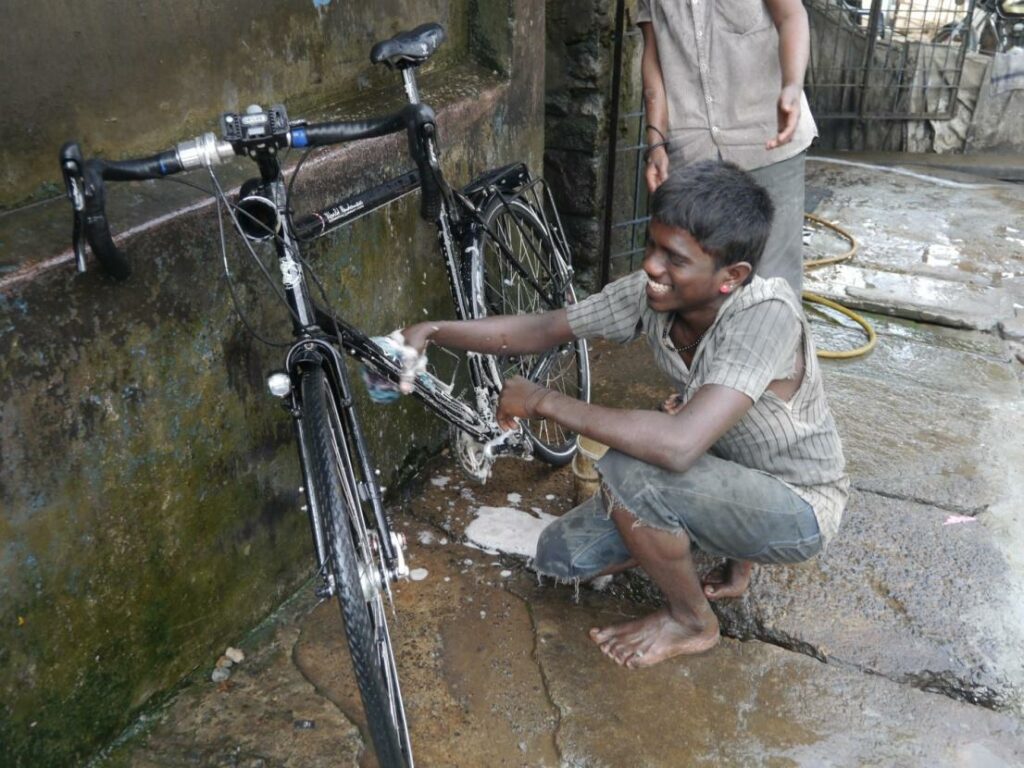
Bike Cleaning for Bike Packing
Bikes often get dirty and this can be an issue as you proceed through airport arrival. It is wise to clean the bike in the day before the end of a tour. You can do it in a hotel room, or along the road.
Bike Packing with Drop Bars vs Flat Bars & Other General Points
- As stated above, in both cases we recommend that you remove the handlebar stem and handlebars as one unit and attach it to the right side of the bike. In the case of flat (riser and trekking bars), as shown in the video, rotate the brake and shift levers so they are better inside the envelope of the handlebars.
- Shorter bike cartons may be used if the front forks are turned to face backwards. Get into the habit of always rotating the forks clockwise to pack and anticlockwise to reassemble. If you ever need to use a carton that is too short you can save a few centimeters by removing the front brake caliper. Just leave it hanging there. Only do this if the carton is actually too short. In reassembly, the two 6mm screws must be made very tight.
- It is easy to mix up your cables but easy not to. The key points are
- (a) undo the rear brake housing at the front end of the top tube and pass the housing over top of the fork steerer for packing and return it before putting the stem back on in reassembly;
- (b) after you initially put the stem back on and have rotated the forks back to straight ahead, pause and look at the cables. If they are wrong now is the time to fix them. You may have to rotate the bars the other way.
- Locate and lightly attach the front wheel to the left side of the frame as shown in the video before starting to attach the bar assembly. Have 250 or 300mm zip ties within reach e.g. in your mouth. No distractions. The ideal position for the bar assembly depends on the model and frame size. The key things are
- (a) no tugging or kinking of any housing;
- (b) the right-hand side having no protrusion. Imagine in the aircraft loading that pressure is applied to the right side of the bike. Would the parts be better able to withstand this if you moved the bars and levers a little before zip tying? In the worst case the bike will be at some stage horizontal with other luggage on top of it. It is unlikely but you should prepare for it. This is why we don’t like soft bike packs for bike packing. Cartons not only offer protection but allow handlers to sit them upright.
- In the case of Swabia also removed from the fork steerer the shift lever mounting bar.
- In the case of the Patagonia make sure the shift levers can’t puncture through the carton wall.
- With drop bars you may use zip ties to hold each brake lever in.
- Locate and lightly attach the front wheel to the left side of the frame as shown in the video before starting to attach the bar assembly. Have 250 or 300mm zip ties within reach e.g. in your mouth. No distractions. The ideal position for the bar assembly depends on the model and frame size. The key things are
- (a) no tugging or kinking of any housing;
- (b) the right-hand side having no protrusion. Imagine in the aircraft loading that pressure is applied to the right side of the bike. Would the parts be better able to withstand this if you moved the bars and levers a little before zip tying? In the worst case the bike will be at some stage horizontal with other luggage on top of it. It is unlikely but you should prepare for it. This is why we don’t like soft bike packs. Cartons not only offer protection but all ow handlers to sit them upright.
- In the case of Swabia also removed from the fork steerer the shift lever mounting bar.
- In the case of the Patagonia make sure the shift levers can’t puncture through the carton wall.
- With drop bars you may use zip ties to hold each brake lever in.
Finally! Consider Your Panniers when bike packing
Do you check panniers in separately of put them in the carton? This depends on space and total weight. Some protection for the bike is offered by hanging one pannier onto the top of the seat tube so it ends up being the widest part.
Use plenty of tape. Especially on the base of the carton. Run some tape across the top of the hand holes.